Step by Step Procedure
Refer to "Use Case 3" diagram where CloudMesh information is displayed in green.
Activating CloudMesh
|
1
|
Connect Branch Office 1 ip|engine WAN1 router interface to CloudMesh by checking the option. |
|
2
|
Select the CloudMesh Edge which is closest to the ip|engine (Frankfurt). Note that Edge information is common to all the WAN interfaces of the ip|engines on the same Site, for which CloudMesh has been activated. |
Eligible interfaces are WAN Router interfaces on hybrid or full router ip|engines.
|
4
|
Connect Branch Office 2 ip|engine WAN2 router interface to CloudMesh by checking the option. |
|
5
|
Select the CloudMesh Edge which is closest to the ip|engine (London). |
|
7
|
From the SD-WAN Orchestrator main menu, select Network -> Advanced Configuration and open the CloudMesh pane. Check the Overlay IP network address range and the AS Number that are used by the system for cloudmeshing; you cannot edit nor reuse these parameters. |
Checking CloudMesh Connections
|
1
|
Verify whether the CloudMesh configuration is operational by checking that there are supervised connections in the CloudMesh Connections panel of the Supervision -> Overview dashboard. |
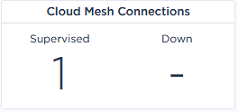
For each connected WAN router interface, one tunnel is created; refer to Use Case 3 diagram. If CloudMesh connections are displayed in the 'Down' column, check the alarms raised for the configured CloudMesh ip|engine in the Active Alarms and Event History dashboards.
|
3
|
On the Network -> Configuration window, click the  icon for the appropriate ip|engine. In the displayed window, select Tunnels -> IPsec to analyze the details of the created CloudMesh tunnels. icon for the appropriate ip|engine. In the displayed window, select Tunnels -> IPsec to analyze the details of the created CloudMesh tunnels. |